How to Upload Files to ESP32 Filesystem Using LittleFS
In this guide, you’ll learn exactly how to upload files to the ESP32 filesystem using LittleFS with Arduino IDE 2.x and an ESP32 DevKit.
What is LittleFS on ESP32?
LittleFS (Little Flash File System) is a lightweight filesystem designed for microcontrollers. It allows you to:
- Store and read HTML, CSS, JS, TXT, JSON files, etc.
- Serve web pages from ESP32
- Save configuration settings or logs
LittleFS is more robust than SPIFFS and is recommended for new ESP32 projects.
Requirements
- ESP32 board (e.g., DOIT ESP32 DEVKIT V1)
- Arduino IDE 2.x
- ESP32 Board Support via Board Manager
- LittleFS Uploader Plugin
- A folder named
/datain your sketch directory
Step 1: Install LittleFS Uploader Plugin
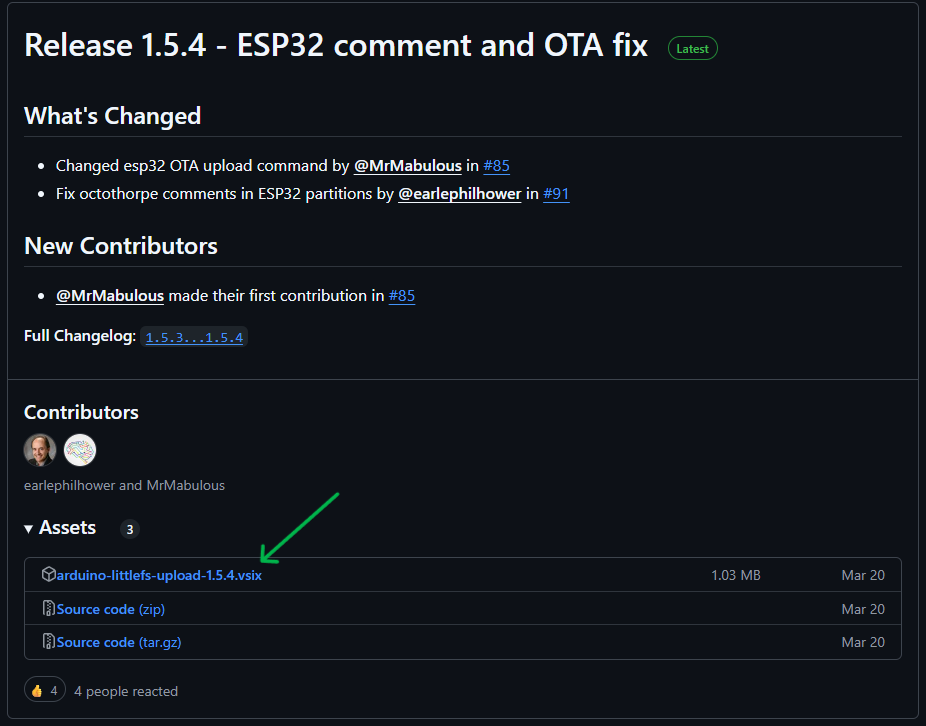
- Go to the GitHub Release page
- Download the latest
.vsixfile (e.g.,arduino-littlefs-upload-1.5.4.vsix) Copy it to:
C:\Users\<YourUsername>\.arduinoIDE\plugins\- Restart Arduino IDE
Step 2: Create the /data Folder

- Navigate to your Arduino sketch folder.
- Create a folder named
data - Add your desired file (e.g.,
soslab.txtwith content likewelcome to soslab.net)
Step 3: Upload Filesystem Image

- In Arduino IDE 2.x, press
Ctrl+Shift+P(or use the top search bar) - Search for:
Upload LittleFS to Pico/ESP8266/ESP32 - Run the command to upload the files to flash memory
You should see a log confirming the upload.
Step 4: Example Code to Access LittleFS on ESP32
This sketch mounts the filesystem, lists the files, and reads the content of soslab.txt:
#include <Arduino.h>
#include <LittleFS.h>

void listFiles() {
  Serial.println("\U0001F4C2 Listing files in LittleFS:");
  File root = LittleFS.open("/");
  File file = root.openNextFile();
  while (file) {
    Serial.printf("  Found: %s (%d bytes)\n", file.name(), file.size());
    file = root.openNextFile();
  }
}

void setup() {
  Serial.begin(115200);
  while (!Serial) delay(10);
  delay(1000);

  Serial.println("\U0001F527 Mounting LittleFS...");
  if (!LittleFS.begin(true)) {
    Serial.println("\u274C LittleFS mount failed");
    return;
  }

  listFiles();

  Serial.println("\U0001F4D6 Reading /soslab.txt...");
  if (!LittleFS.exists("/soslab.txt")) {
    Serial.println("\u26A0\uFE0F File not found! Creating one...");
    File newFile = LittleFS.open("/soslab.txt", "w");
    newFile.println("Hello from SOSLab!");
    newFile.close();
  }

  File file = LittleFS.open("/soslab.txt", "r");
  if (!file) {
    Serial.println("\u274C Failed to open file for reading");
    return;
  }

  Serial.println("\u2705 File Content:");
  while (file.available()) {
    Serial.write(file.read());
  }
  file.close();
}

void loop() {
  // Nothing here
}
Output Example
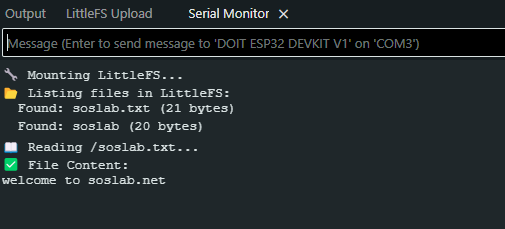
When you open the Serial Monitor at 115200 baud, you should see:
Common Issues
- Can't see 'Upload LittleFS' command? Ensure
.vsixplugin is placed in the correct folder and restart Arduino IDE. - File not found or empty? Make sure you re-upload the filesystem image after changing contents in
/data. - LittleFS mount failed? Add
LittleFS.begin(true)to format corrupted filesystem partitions.
Conclusion
Now you know exactly how to upload files to ESP32 filesystem using LittleFS and Arduino IDE 2.x. This method is ideal for serving web content, saving data logs, and managing ESP32-based projects more efficiently.
Have questions or want to extend this with a web server? Let me know in the comments!
Comments (0)
No comments yet. Be the first to comment!
Leave a Comment